Lexus IS 500 Manual Transmission: A Comprehensive Guide
Lexus has redefined the sports sedan segment by offering a unique driving experience, combining a powerful 5.0-liter V-8 with a manual gearbox.
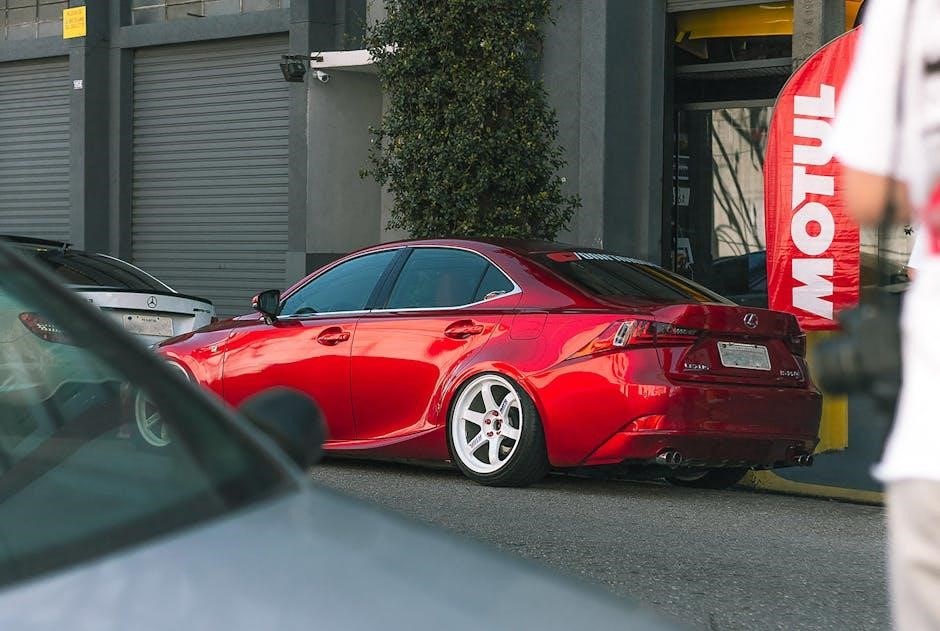
The IS 500 F-Sport boasts a powerful V-8 engine and an understated aggressive aesthetic, making it a prime candidate for a thrilling manual conversion.
Enthusiasts are actively exploring manual swap options, with budgets ranging from $1800 to $2000, considering transmissions like the W55/W58, AR-5, and the high-performance R154.
The Lexus IS 500 F-Sport has rapidly gained recognition as a formidable player in the sports sedan arena, distinguished by its naturally aspirated 5.0-liter V-8 engine and a subtly aggressive design philosophy. However, for a dedicated segment of automotive enthusiasts, the factory-equipped automatic transmission doesn’t fully capture the essence of a truly engaging driving experience. This has ignited a fervent desire within the Lexus community to explore manual transmission swaps, aiming to unlock the IS 500’s full potential.
The appeal stems from a longing for greater driver control, a more visceral connection to the machine, and the satisfaction of mastering the art of heel-toe downshifting. The IS 500, with its robust engine and refined chassis, presents an ideal platform for such a transformation. Online forums, like Club Lexus, are buzzing with discussions, build threads, and shared knowledge regarding the feasibility and intricacies of these swaps, demonstrating a strong collective ambition to bring the joy of a manual gearbox to this exceptional vehicle.
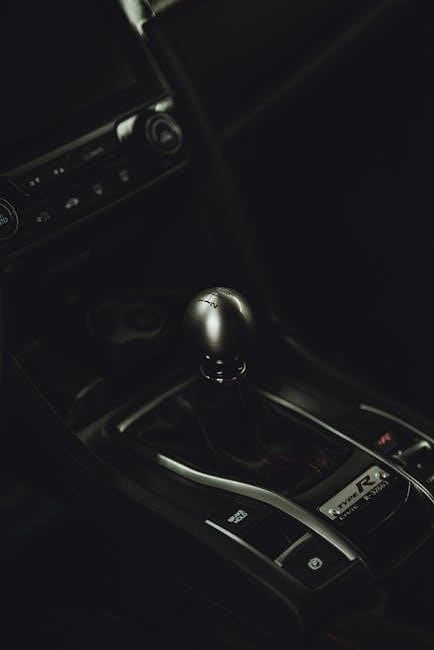
The Appeal of a Manual Transmission in a Modern Sports Sedan
In an era dominated by automatic transmissions and advanced driver-assistance systems, the enduring appeal of a manual gearbox in a modern sports sedan like the Lexus IS 500 might seem counterintuitive. However, for many enthusiasts, the manual transmission represents a fundamental link to the driving experience, fostering a deeper connection between driver and machine. It’s about more than just shifting gears; it’s about control, engagement, and the pure joy of mastering a skill.
The tactile feedback, the precise control over engine RPMs, and the ability to dictate gear selection contribute to a more immersive and rewarding driving experience. This is particularly compelling in a powerful vehicle like the IS 500, where a manual transmission allows the driver to fully exploit the V-8’s capabilities. It’s a return to a more analog form of driving, offering a sense of involvement often lost in the convenience of automated systems.

Exploring Manual Swap Options for the Lexus IS
Many Lexus IS owners desire a manual transmission, leading to exploration of swap options like the W55/W58, AR-5, and the robust R154 gearbox.
Understanding the Challenges of a Lexus IS Manual Swap
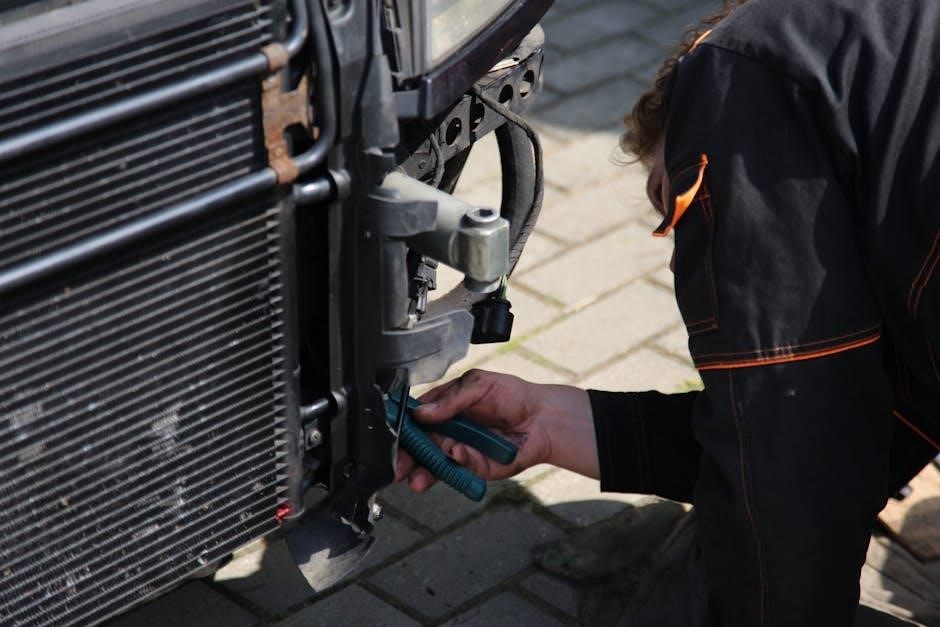
Manual swapping a Lexus IS, particularly the IS 500, presents significant hurdles beyond simply bolting in a new transmission. The factory ECU and TCM (Transmission Control Module) require careful consideration, as the car wasn’t originally designed for manual operation.
Tricking the TCM to function correctly with a manual gearbox is a common approach, requiring specific signal manipulation. However, this isn’t always straightforward and can necessitate custom tuning or signal generators. Furthermore, the IS’s floor pan and center console aren’t inherently designed for a manual shifter, potentially requiring modifications or fabrication.
Compatibility issues also arise; finding a transmission that physically fits and aligns correctly with the engine and driveshaft can be complex. The process isn’t simply plug-and-play, demanding substantial mechanical skill and potentially professional assistance. Lexus IS models are notoriously difficult to swap, demanding patience and meticulous planning.
Transmission Compatibility: Identifying Suitable Options
When considering a manual swap for your Lexus IS 500, several transmission options emerge, each with its own advantages and drawbacks. The W55 and W58 transmissions are frequently chosen due to their relative affordability and availability, often fitting within a tighter budget of $1800-$2000.
However, the AR-5 transmission presents an alternative, potentially offering improved strength and reliability. For those seeking ultimate performance, the R154 transmission stands out, renowned for its robust construction and ability to handle significant power – crucial for boosted IS models exceeding 400whp.
The choice hinges on your power goals and budget. Naturally aspirated (NA) IS swaps can often suffice with a W55/W58, while boosted applications generally benefit from the increased durability of the R154. Careful consideration of gearing is also vital, tailored to whether the IS is naturally aspirated or turbocharged.
The W55/W58 Transmission: A Common Choice
The W55 and W58 transmissions are popular choices for Lexus IS manual swaps, largely due to their accessibility and cost-effectiveness. Often found in older Toyota Supras and other rear-wheel-drive vehicles, these transmissions represent a budget-friendly entry point into the world of manual conversions, typically fitting within the $1800 to $2000 budget range.
While not as robust as the R154, the W55/W58 can handle moderate power levels, making them suitable for naturally aspirated IS models. However, owners planning boosted builds should carefully consider their power goals, as these transmissions may require reinforcement or eventual replacement with a stronger unit.
Compatibility is generally good, but modifications may be necessary for the driveshaft, shifter linkage, and potentially the transmission mount. Thorough research and planning are crucial for a successful W55/W58 swap.
The AR-5 Transmission: Exploring Alternatives
The AR-5 transmission presents an intriguing alternative to the more commonly used W55/W58 for Lexus IS manual swaps. Sourced from various Toyota models, including the Celica and MR2, the AR-5 offers a potentially stronger and more refined driving experience compared to its W-series counterparts.
While potentially more expensive and harder to locate than the W55/W58, the AR-5 boasts closer gear ratios and a more modern design. This can translate to improved performance and a more engaging driving feel, particularly for those seeking a sportier experience.
However, AR-5 swaps often require more extensive modifications, including custom driveshafts and potentially bellhousing adapters. Careful consideration of these additional costs and complexities is essential before committing to an AR-5 conversion.
The R154 Transmission: High-Performance Potential
The R154 transmission stands as the pinnacle of manual swap options for the Lexus IS, particularly for boosted applications aiming for substantial power. Originally found in the Toyota Supra MKIV, this robust gearbox is renowned for its exceptional strength and durability, capable of handling significantly more torque than the W55/W58 or AR-5.
However, the R154 swap is the most complex and expensive route. It necessitates substantial modifications, including a custom bellhousing, driveshaft, and potentially transmission tunnel adjustments. The cost can quickly escalate, but the reward is a virtually bulletproof transmission.
Dedicated threads and resources detail the intricacies of the R154 swap, emphasizing the need for meticulous planning and skilled fabrication. It’s the preferred choice for IS models exceeding 400whp, offering peace of mind and reliable performance.
Transmission Gearing Considerations for Different IS Models
When contemplating a manual swap, transmission gearing must align with the IS model’s engine characteristics. Naturally aspirated (NA) IS models benefit from closer ratios, maximizing acceleration and keeping the engine within its powerband. The W55 or W58 often suffice for NA swaps, offering a balance of affordability and performance.
However, boosted IS models demand more robust gearing to handle increased torque. Cars exceeding 400whp typically require the R154, known for its strength. Gearing choices impact both street drivability and track performance.
The community emphasizes that boosted setups necessitate careful consideration of final drive ratios to prevent excessive wheelspin or overly tall gearing. Matching the transmission to the power level is crucial for optimal results, ensuring a responsive and enjoyable driving experience.
NA (Naturally Aspirated) IS Manual Swaps
For naturally aspirated (NA) Lexus IS models undergoing a manual transmission swap, the focus often centers on achieving enhanced driver engagement without drastically altering the car’s original character. The W55 and W58 transmissions are frequently chosen due to their relative affordability and suitability for the engine’s power output.
These transmissions provide a noticeable improvement in driving feel compared to the automatic, offering more control and a direct connection to the engine. Gearing considerations lean towards closer ratios to maximize acceleration and maintain responsiveness.
NA swaps generally require less extensive modifications compared to boosted applications, simplifying the process and reducing overall costs. The goal is a balanced, enjoyable driving experience that complements the IS’s naturally aspirated engine.
Boosted IS Manual Swaps: Handling Increased Power
When undertaking a manual swap on a boosted Lexus IS, the transmission choice becomes critical due to the significantly increased power output. The W55/W58, while cost-effective, may struggle with sustained high horsepower, making the more robust R154 a popular, albeit pricier, option.
Boosted IS builds often exceed 400whp, demanding a transmission capable of handling the torque. Gearing must be carefully considered to optimize acceleration and prevent wheelspin, with many opting for shorter final drive ratios.
Reinforced clutch components and a strengthened flywheel are essential upgrades to withstand the added stress. Proper cooling solutions for the transmission are also recommended to prevent overheating during aggressive driving. Careful planning and component selection are vital for a reliable and enjoyable boosted manual IS;

The Manual Swap Process: A Detailed Overview
The manual swap involves a comprehensive parts list, ECU/TCM considerations, and potentially tricking the TCM to function correctly with the new transmission.
Careful planning and execution are crucial for a successful conversion, ensuring a rewarding driving experience.
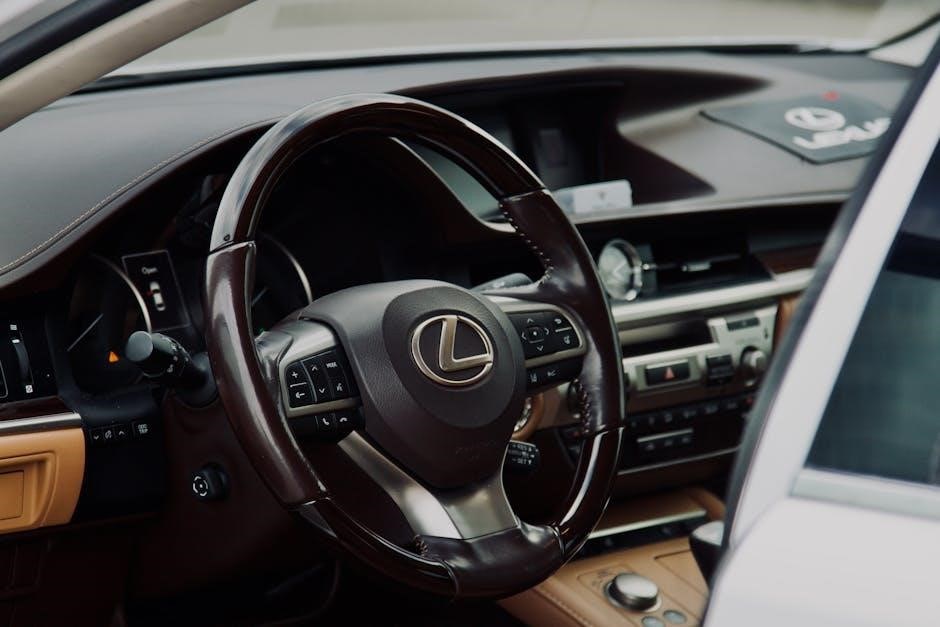
Parts List for a Lexus IS Manual Transmission Swap
A comprehensive parts list is essential for a successful Lexus IS manual transmission swap. This includes the donor transmission itself – commonly a W55, W58, AR-5, or R154 – along with a matching flywheel and clutch assembly. You’ll need a pedal assembly, including the clutch pedal, sourced from a manual IS model.
Don’t forget the shift linkage and associated hardware, potentially requiring modification for a clean fit. A new master and slave cylinder for the clutch are vital, alongside a driveshaft that accommodates the manual transmission’s length. Expect to source a transmission crossmember and potentially modify the exhaust system for clearance.
Furthermore, consider the shifter itself, along with any necessary bushings and mounting brackets. Wiring harness modifications or a standalone ECU may be required, depending on the chosen transmission and ECU strategy; Finally, factor in fluids – transmission oil and clutch fluid – and hardware like bolts and fasteners.
ECU and TCM Considerations: Managing the Swap
ECU (Engine Control Unit) and TCM (Transmission Control Module) management is critical during a Lexus IS manual swap. Since manual transmissions don’t require the TCM’s control, the primary focus shifts to ensuring the ECU functions correctly without transmission-related error codes. A common approach involves “tricking” the TCM, providing it with signals that mimic automatic transmission operation.
This can be achieved through signal generators or custom wiring, preventing the system from entering limp mode. However, a standalone ECU offers greater control and eliminates the need to interface with the factory TCM altogether. Careful consideration must be given to speedometer recalibration, as the manual transmission’s output differs from the automatic.
Proper tuning is essential to optimize engine performance and ensure seamless integration with the manual gearbox. Ignoring these considerations can lead to drivability issues and potential damage to the vehicle.
Tricking the TCM (Transmission Control Module)
Tricking the Transmission Control Module (TCM) is a popular method for completing a Lexus IS manual swap without a full standalone ECU. The goal is to provide the TCM with signals that simulate an automatic transmission’s operation, preventing error codes and ensuring the vehicle functions correctly. This typically involves intercepting signals related to gear selection and speed.
Various methods exist, including utilizing signal generators or custom wiring harnesses to feed the TCM fabricated data. Successfully deceiving the TCM allows the factory ECU to continue managing engine functions without interference. However, this approach requires precise calibration and understanding of the TCM’s input requirements.
Incorrect implementation can lead to unpredictable behavior or the TCM overriding the driver’s input. Thorough research and careful execution are paramount for a reliable outcome.
Potential Costs Associated with a Manual Swap
A Lexus IS manual swap involves a significant financial commitment, varying based on chosen components and labor. A budget of $1800 to $2000 is often cited as a starting point, primarily covering the transmission itself – typically a W55 or W58 model. However, this is a baseline estimate.
Additional expenses include a new clutch kit, flywheel, pressure plate, throw-out bearing, and potentially a modified driveshaft. Custom fabrication for the shifter assembly and transmission mount adds to the cost. Fluids, hardware, and potentially ECU/TCM modifications also contribute.
Labor costs can dramatically increase the overall price if professional installation is required. Unexpected issues during the swap can also inflate the budget. Thorough planning and sourcing used parts strategically can help manage expenses.
Budgeting for a $1800 ⎼ $2000 Manual Swap
A $1800-$2000 budget for a Lexus IS manual swap necessitates careful allocation. The core expense is the transmission – aiming for a used W55 or W58 in good condition, costing roughly $800-$1200. A quality clutch kit (flywheel, pressure plate, disc, bearing) will consume $300-$500.
Expect to spend $100-$200 on fluids (transmission, differential) and hardware. Shifter assembly components and a custom transmission mount can add $200-$400, depending on fabrication needs. This budget assumes you can perform the labor yourself, saving significantly on mechanic fees.
Prioritize essential components; cosmetic upgrades can wait. Sourcing used parts from forums and online marketplaces is crucial. Contingency funds of $200-$300 are vital for unforeseen issues or additional hardware.
Common Issues Encountered During a Manual Swap
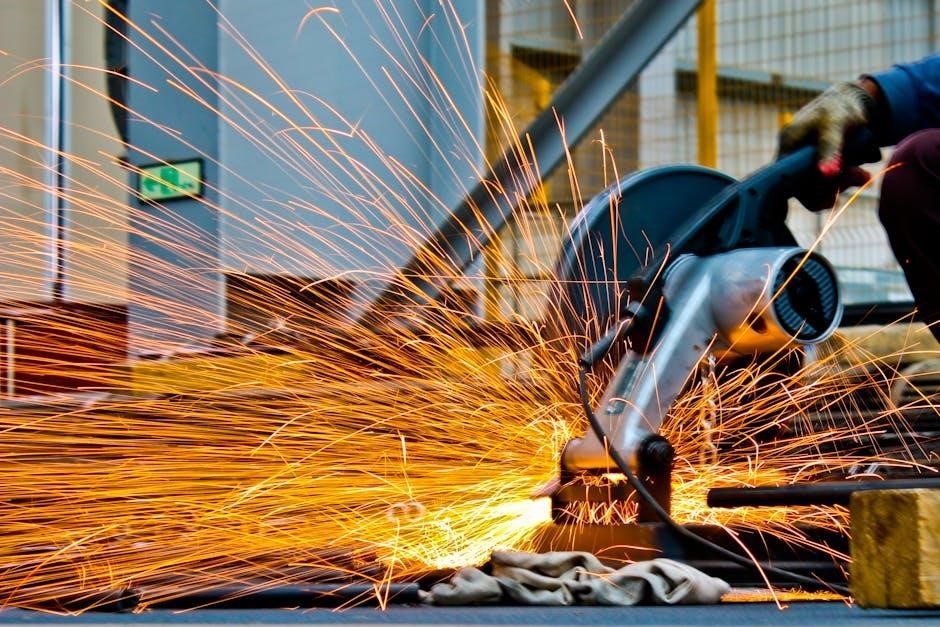
Manual swaps on the Lexus IS aren’t without challenges. A frequent hurdle is transmission mount fabrication; custom mounts are often required, demanding welding skills or professional assistance. Wiring can be complex, particularly ‘tricking’ the Transmission Control Module (TCM) to prevent error codes, requiring careful signal manipulation.
Clearance issues can arise between the transmission tunnel and the new gearbox, potentially needing tunnel modification. Pedal assembly compatibility is another concern; adapting the brake and clutch pedals may necessitate custom brackets. Expect potential difficulties sourcing specific parts, especially for less common transmissions like the AR-5.
Post-swap, synchronization issues or clutch engagement problems may surface, demanding meticulous adjustment. Thoroughly research and prepare for these potential roadblocks to ensure a smoother conversion process.

Specific Considerations for Different IS Generations
Manual swap feasibility varies across IS generations; the IS 350 presents unique challenges, while opting for an IS 250 manual is a viable alternative.
Careful evaluation of each generation’s specific components and available resources is crucial for a successful manual conversion project.
Manual Swap Feasibility for the IS 350
The IS 350 presents a more complex manual swap scenario compared to other IS models, but it’s demonstrably achievable, as evidenced by successful builds documented within the Club Lexus forum community. However, prospective swappers should be prepared for a significant undertaking requiring meticulous planning and execution.
A primary consideration is transmission compatibility; while the IS 250 transmission can be used, it’s often criticized for its relative weakness and less-than-ideal gear ratios. Consequently, many opt for the more robust W55 or W58 transmissions, or even the high-performance R154, though these require more extensive modifications.
The ECU and TCM (Transmission Control Module) also demand attention. The TCM doesn’t inherently need a controller with a manual transmission, but it requires “tricking” with the correct signals to function correctly alongside the factory ECM. This involves ensuring the system believes it’s still interacting with an automatic transmission, preventing error codes and ensuring proper operation. Budgeting appropriately for these complexities is essential.
Comparing a Manual Swap to Purchasing an IS 250 Manual
When contemplating a manual transmission for your Lexus IS, a crucial decision arises: undertake a swap on an existing model, or purchase a factory-equipped IS 250 manual? Both paths have distinct advantages and drawbacks that warrant careful consideration.
A manual swap, particularly on an IS 350, allows you to retain the more powerful engine while gaining the desired manual experience. However, it demands significant investment in parts, labor (if not DIY), and potential troubleshooting. The cost can easily approach or exceed the price difference between a swapped IS 350 and a well-maintained IS 250 manual.
Conversely, purchasing an IS 250 manual offers a simpler, potentially more cost-effective route. You avoid the complexities of the swap and benefit from a factory-built configuration. However, you sacrifice the IS 350’s superior engine performance. Ultimately, the optimal choice hinges on your budget, mechanical aptitude, and performance priorities.
Resources and Communities for Lexus IS Manual Swaps
Undertaking a Lexus IS manual swap can be a complex endeavor, making access to reliable information and a supportive community invaluable. Fortunately, several online resources cater specifically to this modification.

Club Lexus stands out as a premier forum for IS owners, boasting a dedicated section for manual swap discussions. Here, you’ll find detailed build threads, parts lists, troubleshooting advice, and direct interaction with experienced swappers. This platform is a treasure trove of collective knowledge, offering solutions to common challenges.
Beyond Club Lexus, Facebook groups dedicated to Lexus IS modifications can provide additional support and insights. Searching for “Lexus IS manual swap” will reveal relevant groups where enthusiasts share their experiences and offer assistance. Remember to verify information and exercise caution when sourcing parts from online marketplaces.
The Club Lexus Forum: A Valuable Resource
The Club Lexus forum consistently emerges as the most highly recommended resource for individuals contemplating or actively engaged in a Lexus IS manual transmission swap. Its enduring popularity stems from a wealth of accumulated knowledge, meticulously documented within numerous dedicated threads.
Within the forum, you’ll discover comprehensive build logs detailing every step of the process, from initial parts acquisition to final adjustments. These logs often include detailed parts lists, cost breakdowns, and invaluable lessons learned by experienced swappers. The search function is your ally, allowing you to pinpoint solutions to specific issues.
Moreover, the active community fosters a collaborative environment where members readily share advice, offer troubleshooting assistance, and even connect for local support. Don’t hesitate to post questions – the collective expertise of Club Lexus members is a powerful asset.

Performance Implications of a Manual Transmission
A manual transmission enhances driver engagement and control, offering a more tactile and connected driving experience within the Lexus IS 500.
It potentially impacts vehicle performance metrics, allowing for more precise gear selection and optimized power delivery during spirited driving.
Enhanced Driver Engagement and Control
The allure of a manual transmission in a modern sports sedan like the Lexus IS 500 centers around a dramatically enhanced connection between driver and machine. Unlike the detached feel of an automatic, a manual gearbox demands active participation, requiring precise clutch control, deliberate gear selection, and a heightened awareness of the engine’s powerband.
This active involvement translates into a more immersive and rewarding driving experience. Drivers aren’t simply passengers; they are integral to the car’s performance, dictating the rhythm and intensity of each drive. The ability to choose the exact gear for any given situation – whether navigating winding roads or accelerating onto a highway – provides a level of control simply unattainable with an automatic transmission.
Furthermore, the tactile feedback from the shifter and clutch pedal creates a more visceral sensation, fostering a deeper appreciation for the mechanical intricacies of the vehicle. This heightened engagement isn’t just about performance; it’s about forging a stronger emotional bond with the car, transforming every drive into a truly engaging event.
Potential Impact on Vehicle Performance Metrics
A manual transmission swap in a Lexus IS 500 can subtly, yet noticeably, impact several key performance metrics. While horsepower figures remain unchanged, the efficiency of power delivery to the wheels can improve, potentially leading to slightly quicker acceleration times. This is due to the elimination of torque converter losses inherent in automatic transmissions.
However, the ultimate impact hinges heavily on gearing choices. For naturally aspirated IS models, optimized gearing can enhance responsiveness and improve the driving experience. Boosted IS models, generating significantly more power (400whp and beyond), require robust transmission options like the R154 to reliably handle the increased torque. Incorrect gearing can actually detract from performance.
In addition, driver skill plays a crucial role. A skilled driver can consistently extract more performance from a manual transmission than an automatic, maximizing acceleration and maintaining optimal engine RPMs. Weight reduction, a common byproduct of the swap, also contributes to improved handling and braking performance.
Future Outlook: Lexus and Manual Transmissions
The future of manual transmissions within Lexus remains uncertain, despite the enthusiastic aftermarket support for swaps like the IS 500. While Lexus recently responded to enthusiast demand by offering a manual option on the IS 500, it’s a limited-production model, signaling a cautious approach.
Industry trends indicate a general decline in manual transmission availability across all manufacturers, driven by consumer preference for automatics and the complexities of integrating manuals into modern vehicle platforms. However, the enduring passion within the Lexus community, demonstrated by extensive manual swap projects, suggests a continued demand.
It’s plausible Lexus might explore offering more manual options in future generations of performance models if demand persists and engineering challenges can be overcome. For now, the aftermarket remains the primary avenue for enthusiasts seeking a manual IS experience, fostering a vibrant community dedicated to these conversions and pushing the boundaries of what’s possible.